
Introduction to the Battledome
The Battledome  is a place where your pet can fight with a scripted challenger or another pet. There are many reasons people battle, including entertainment, avatars, plot points, bragging rights, and trophies. This guide will aim to make you a good battler without wasting time and Neopoints on horrible weapons.
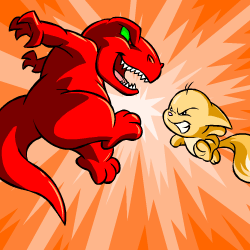
Quite obviously, the aim of competitive battling is to beat another pet by lowering their HP (Hit Points) to zero before your HP goes to zero. You can equip up to eight weapons, using a maximum of two per turn.
Icon Types
There are seven types of icons in the battledome. They are shown below and are most commonly called (in order from left to right): Air, Earth, Dark, Light, Fire, Water, Physical.


Likewise, these show the icons being defended (or reflected) against.


Your equipment will have a distinct effect or conjunction of effects. Many weapons are fractional, meaning the amount of icons they attack or defend is not a whole number, even though the battledome displays them as whole icons. This is where tactics and strategy play in, as some icon types are harder to block than others because of weapon availability and icon variety in equipment.
Pets
Battling is largely influenced by the pet you are battling with and your opponent. Even when using the same weapons, a stronger pet can do up to 30 times as much damage as the weaker pet. You can make your pet stronger by training at the various schools or using power-up items known as stat increasers. If you are just starting out, training at the Swashbuckling Academy will be the most economically efficient way to train if you want a balanced build.
Note that movement does not affect fighting at all, with the exception of a handful of weapons that deviate from their usual effect.
Battle Pet Types
Balanced
Balanced pets are the most popular as they usually have neat, even stats with Hit Points, Defense, and Strength. As your pet approaches the highest boost (700), you will have an advantage against lab pets and tanks that concentrated on training mostly attack and defense, respectively.
Lab Rat
Lab "Rats" are exactly what they sound like. They train solely by visiting the Secret Laboratory after completing the map to get access to it. These pets will usually have extremely high HP, high strength, high movement, and extremely low defense and level. The bright side of lab training is that it is more economical once you dish out the money to get access to the lab. It will usually take longer than traditional training.
Many trainers whose pets have reached the 700 boost in Strength start feeding their pet Armoured Neggs to increase their defence. They are usually around 35k each and are limited by your pet's hunger.
Tank
Tanks are pets with extremely high defense. The strategy for them is to nullify most or all of their opponent's attacks while throwing a little bit of damage every turn. Far less common than the first two, tanks are mostly used for league battling (which will be covered in Article 4 of this walkthrough.)
Battle Pet Species
Some species are notably better for battling than others. Some species, like Kacheek, Lenny, and Lupe, have great weapons exclusive to their species that are much cheaper than their non-species counterparts. Others, such as Scorchio, Pteri, Tonu, and Kau have great resistances to different icon types. Note that some pets are created with higher stats than others.
Weapons
Weapons are a critical part of your battles. A pet without weapons is like a computer without electricity. Most weapons are complete junk and this guide will help you avoid those. Weapon selection will be discussed in a later article.
Weapon Effects: Attack
This is the most basic kind of effect. You do damage based on how many icons a weapon does multiplied by your strength boost, your stance, and your opponent's stance.
For example, if you take Scroll of the Earth, which does a total of 8.6 icons, and if your pet has a strength of 50, the damage you do would be 1.5 x 8.6 = 12.9 HP.
Weapon Effects: Defense
If there is one thing that is misunderstood about the battledome, it's the way defense works. Increasing your defense should be part of your training as it will allow you to block more damage from your opponent. But how does defense really work in the battledome?
Icons of your weapon X stats booster = Amount of damage you will block.
You can find more information about boosts here.
Concretely, if your weapon has the same amount of defensive icons of a certain type as your opponent has on the offensive side, two scenarios are possible:
- Damage completely blocked if: Your defense is even or greater than the strength of your opponent.
- Damage partially blocked if: Your defense is weaker than the strength of your opponent.
Example:
You have a defense of 85 and you are using a Scarab Ring to defend yourself against an opponent who has a strength of 85 and is using a Hand Carved Kau Blade as a weapon. These two weapons have the same icons: the Scarab Ring blocks 3 fire and 3 physical, and the Hand Carved Kau Blade is dealing 3 fire and 3 physical. Because your defense is equal to the strength of your opponent, the attack will be blocked completely. The same thing would happen if your defense boost is higher than the strength boost of your opponent.
However, if the same weapons are used during the battle and the strength boost of your opponent is greater than your defense boost, you will only block the attack partially.
Let's say that the strength of your opponent is equal to 250. It would give him a 5.5 boost and he would deal 16.5 fire damage and 16.5 physical damage. In this example, you are still using the Scarab Ring to defend yourself (3 fire and 3 physical icons) multiplied by 2.5 (the defense boost associated with 85 defense stat), which means that the maximum amount of damage you can block is 7.5 fire and 7.5 physical damage. Your pet would lose 18 hit points (9 from fire damage and 9 from physical damage). Yay for mathematics!
Weapon Effects: Reflect
Reflection is calculated exactly the same as defense, except instead of the attack being nullified, a percentage of it is thrown back at your opponent. If you move before your opponent, the reflected icons will be un-blockable. Credit to noxmiles for assembling the proof of this.
Weapon Effects: Steal 
Stealing in the battledome is not against the rules. Using a stealer, such as Purple Sticky Hand, you can steal one of your opponent's weapons for the battle. (The victim gets it back after the battle.) It is random which weapon in the set will be stolen.
Weapon Effects: Heal 
Healing Items are like the energy bar or refreshing beverage after a long and tiring workout before you head out for the second half. There are two types of healers: regular and overhealing.

The difference is quite simple. Let's take an example: Magical Healing Potion and Bronze Scorchstone. Let's say you have 3/10 HP left and your opponent will deal 5 damage next turn. Regular healers heal before damage while overhealers heal after damage.

Magical Healing Potion
If you use Magical Healing Potion, a regular healer, you would be healed to 3+15 = 18/10. However, your HP cannot go over your maximum in HP in battle, so your HP rounds off at 10/10. The opponent's attack is calculated and you are left with 10-5 = 5/10 HP.

Bronze Scorchstone
If you use Bronze Scorchstone, an overhealer, the opponent's damage is calculated first, leaving you with 3-5 = -2 HP. Your healer now kicks in, healing you up to -2+15 = 13/10, which rounds off to 10/10. If the healer was weaker than 2 HP, you would have lost the fight.
Weapon Effects: Freeze 
Freezers do exactly what they sound like: they render your opponent immobile for one turn. During this turn, they cannot use weapons and can only use the equivalent of cautious attack. It is a free turn to attack your opponent!
Weapon Effects: Others
There are more weapon effects, most of which are covered in this article.
Weapon Reliability
You can find the reliability of a weapon on the top right corner of each weapon profile on The Daily Neopets Items Database.
| Reliability | Meaning | Multiple Use | These weapons will never break and you can use them as many times as you want. |
|---|---|
| Semi-Fragile | These weapons may break, but you get them back at the end of the battle. |
| Fragile | These weapons can break, and when they do, they are gone forever. |
| Once Per Battle | These weapons will never break and can only be used once per battle. |
| Once Per Battle, Fragile | These weapons can only be used once per battle and can break. When they do, they are gone forever. |
| Single Use | These weapons will disappear forever after they are used. |
Faerie Abilities
This is the last part of your battle plan. Every turn in the battledome, you get to pick one ability in conjunction with your two weapons.
Faerie Abilities can be obtained from blessing your pets with Bottled Faeries and spending the blessings at Aethia's Academy. Bottled Fire Faeries gives fire abilities, Bottled Water Faeries gives water abilities and so on. Abilities can help you do a lot of things, such as adding 3 light icons to your attack, reducing the damage that you receive by a percentage, reflecting icons back to your opponent, preventing your opponent from using weapons on that turn, and more. To learn more, visit our guide about faerie abilities.
Continue with articles in this series...
- Introduction to the Battledome
- Preparations for Battle
- Inside the Battledome
- Two Player Battles
- Melida's Journey: Training Guide
Alerts
 The Snowager
Snowager is sleeping!
 Next Possible Wake
Jul 25: 10 AM/PM NST
Jul 26: 3 AM/PM NST
Jul 27: 8 AM/PM NST
Jul 287: 1 AM/PM NST
 Obelisk War: Truce
Next cycle: 1d, 17h, 59m
