

The Last Blast
| Link to Game | Trophies | Avatar(s) | ||
|---|---|---|---|---|
Play now!  |
   |
There aren't any avatars from this game. | ||
| Difficulty Meter | Neopoint Ratio | |||
|
We rate this game medium.
|
 NP Ratio: 2.00 2000 pts :: 1000 NP |
|||
Introduction
In this game, you play Sergeant Zarex, a retired commando who used to work for the top-secret Section Six on Kreludor. He's been called back into service because Kreludor's mines have been taken over by a swarm of deadly robots. Sergeant Zarex is the only Grundo skilled enough to fight his way past Sloth's forces (well who else could it be?) to the control centre and shut down the robots, saving Kreludor's economy in the process. Sound easy? Those robots are determined to make 'no' the answer to that question.
Yes, this is a first-person shooter, but that doesn't mean you can just go charging in with no real idea of what you're doing. This guide will take you through some of the basics.
The Controls
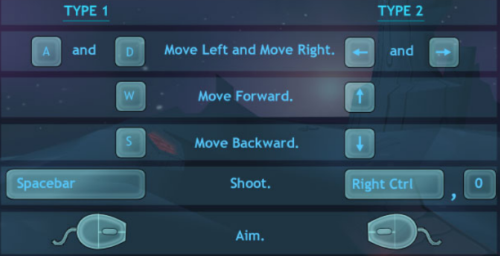
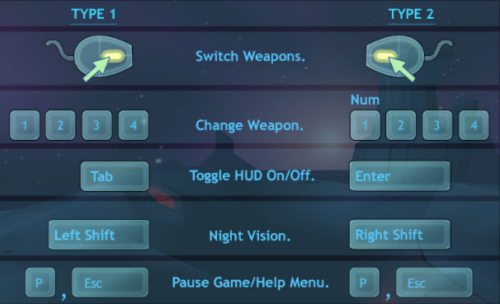
As you can see above, the controls for the game are relatively simple. You use the W, A, S and D keys/the arrow keys to move around, the mouse to aim, the spacebar/right ctrl key/zero key to shoot, and the numbers 1-4 to change weapons. The tab key will toggle the HUD that displays the weapons you have along with their ammunition levels. The shift keys are supposed to be used to turn on night vision, but this is only possible with one of the special items that TNT decided not to release, and it's not really needed for the game anyway.
The 'Type 1' controls are generally more comfortable for right-handed people, and the 'Type 2' controls for left handed people.
The Display
This diagram will give you a brief overview of the important elements of your helmet's display:
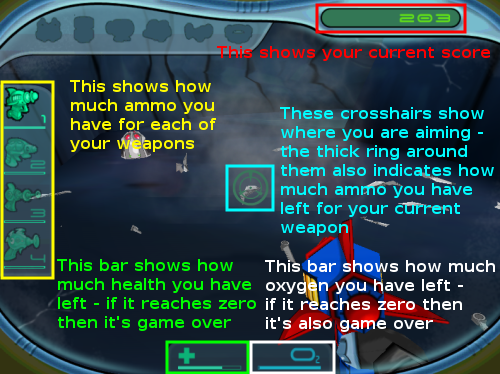
The HUD that displays the ammo levels for all of your weapons is pretty much essential, but it isn't displayed by default and has an annoying habit of mysteriously disappearing randomly during the game - remember, press the 'tab' key to turn it back on.
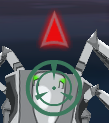
Arrow by Your Helmet
Your helmet will also display an arrow like the one to the right if you are attacked. The arrow will give you an idea of which direction the attack is coming from, which is very important if you can't see the attacker.
Oh, and if you see a menacing blue face with two huge red eyes grinning at you, don't panic - it's just your reflection.
The Maps (and your objectives)
At the beginning of each of the three levels, you should appear in a 'safe' chamber (but don't move too far forward or that will change very fast). In the corner of the chamber there should be a computer console displaying a rough map of the level. It is extremely important that you look at this map to so you have some idea of where you are going. Don't spend too much time here though - your oxygen supply decreases slowly but steadily. This is the map for the first level, with some labels added to give you an idea of how to read it:
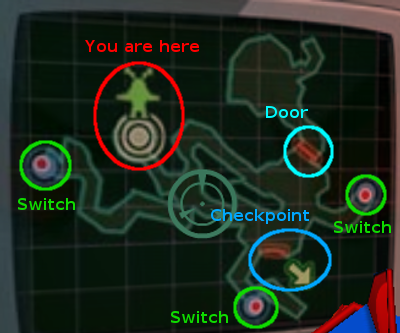
Your main goal for the first two levels is to reach the checkpoint. On the third and final level, your main goal will be to get into the control centre (sealed off by doors) and disable Sloth's computer core (marked by a big bullseye on the map). Doors and checkpoints have to be opened with switches before you can go through them, so you will have to travel to each switch and activate it to get through the level. This means that planning your route through a level is a vital step towards success.
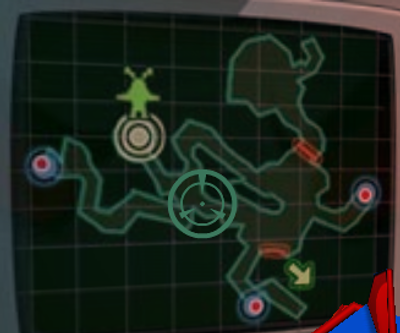
The maps for each level are shown below for your use, just in case you have a poor memory for maps or are in a hurry to get through the levels as fast as possible. You still need rudimentary map reading skills to guide you through the level, but hey, it cuts down the chance of getting lost. ;)
Level 1
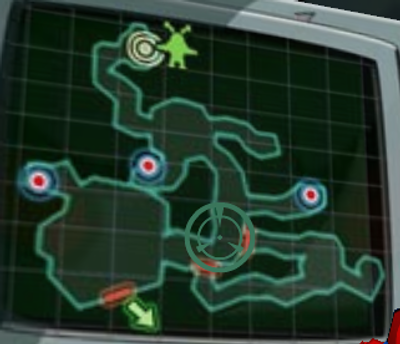
Level 2
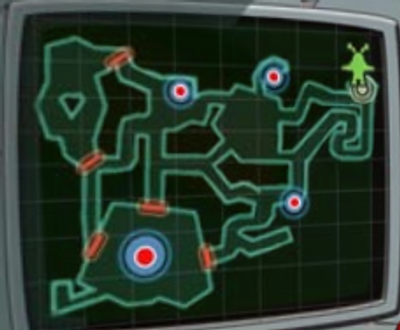
Level 3
Weapons
There are four different weapons that you will use in the game. You will start out with the Bzzt Blaster and get a new weapon from a switch on each level. Keep in mind that you can fire and move at the same time, so there's no need to stop each time you shoot.
| Bzzt Blaster | |
|---|---|
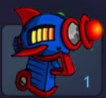 |
There's a tendency to think 'Oh, this is the starter weapon so it must be useless - I'll ditch it as soon as possible.' This is absolutely wrong. While it's true that the Bzzt Blaster lacks the punch to get through the tougher enemies as fast as you'd like to, this weapon does not need any ammunition. This is a life-saving feature. If the ammo for your other weapons starts running low (if it drops below a third of your capacity), don't let it run out. Unless you're in a tight spot, save the ammo for when you really need it - use the Bzzt Blaster instead. Another handy thing about this weapon is that the beam it fires is reasonably wide, so you don't have to be an expert sniper to use it. |
| Virtublaster 3000 | |
 |
This will probably become your primary weapon later in the game. Aim and hold down space for a few seconds, and you will see that the Virtublaster is capable of reducing even the toughest of enemies to scrap metal within a few seconds. Fire at a bunch of enemies that are lined up in front of you, and the effects are even more spectacular. This gun isn't greedy either - you can keep it firing for a reasonably long time without replenishing its ammo. The only real problem with this weapon is that the thin beam makes it hard to hit small targets - always take that extra half second to get your aim just right. It's worth it. |
| Goo Blaster | |
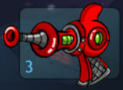 |
This weapon is simply amazing. One or two squirts into a large group of enemies will leave them all either destroyed or severely weakened. Three or four squirts will take out just about anything. The damage is dealt in small amounts over several seconds, but any enemies hit by the goo will be immobilised during that period, so it doesn't really matter. However, the Goo Blaster can only be used close up, and it has a big appetite for ammo, so don't waste your shots. |
| Sleep Ray | |
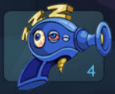 |
Some people don't like this weapon at first, because it doesn't do any actual damage to the enemies it hits, but it can really save your skin in the later levels. The ray it fires is quite wide and travels pretty far, so it's capable of knocking out a whole bunch of pursuers for a few seconds. Enemies don't take as many shots to kill when they're asleep, so throw in a squirt or two from the Goo Blaster or a few seconds of Virtublaster fire and you'll be left with plenty of breathing space. Don't use this weapon too often though - it eats up ammo even faster than the Goo Blaster. |
Enemies
Ah yes, Sloth's evil servants, teleporting continuously to your current location and attacking you viciously - or at least trying to. They may be only annoying at first, but if you don't watch out they'll start to get truly deadly. Stay vigilant however, and they'll end up as nothing more than a source for points. There are five different types of enemies that you will encounter, which are outlined below.
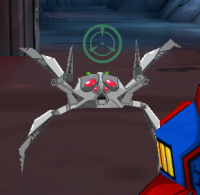
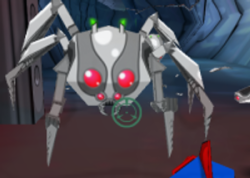
Eeek! Get it off me!
You will encounter these robot spyders at the beginning of the first level. While they may be only half your height and easily destroyed with only 3 zaps from the Bzzt Blaster, they are the fastest and most numerous enemies in the game. If you are suddenly attacked from behind, a band of robot spyders is the most likely culprit. The Bzzt Blaster is recommended for one or two of these enemies, and a single squirt of the Goo Blaster will knock out larger groups.
I though petpets were supposed to be small!
First appearing early in the first level, these larger versions of the robot spyders are a bit tougher, taking four shots from the Bzzt Blaster to destroy, and they pack slightly more punch, but they still aren't much of a threat. The Bzzt Blaster or Virtublaster is best for taking out one or two of these, and a single shot from the Goo Blaster will take care of any gangs effectively.
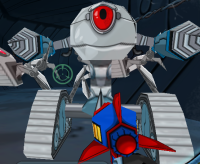
I want one of those!
These tracked robots turn up close to the end of the first level. They are still only marginally dangerous, but damage adds up over time, so don't neglect them. They are also relatively tough, capable of withstanding a single squirt from the Goo Blaster. I'd recommend using the Bzzt Blaster on these if they are quite far away (you'll need to zap them five times), but if they get too close then the Virtublaster is a better choice. For groups, use two squirts from the Goo Blaster (or just one squirt if you've already put them to sleep).
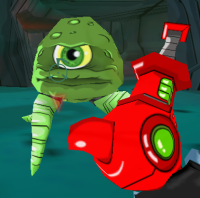
Hey! That's not a robot...
Your first serious opponent will start attacking you somewhere in the middle of the second level. These green aliens are tough, taking nine zaps to kill, and they also do quite a bit of damage. The Virtublaster is best at getting rid of them, although you might want to hit them with the Sleep Ray first. If there's a bunch of them, use three shots from the Goo Blaster (yes, the Goo Blaster works on these even though they aren't robots - don't ask me why).
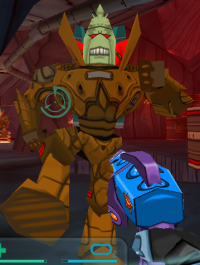
Is it a bird? Is it a plane? Is it a giant statue of Sloth?
No, it's a giant walking statue of Sloth! Run!!!
They may look scary, but these giant third level robots are quite slow and bulky, making them easy pickings from a distance. They aren't as tough as they look either, but hitting them with eight zaps from the Bzzt Blaster would still take a long time - try the Virtublaster instead. Using the Sleep Ray in combination with two or three squirts from the Goo Blaster works pretty well on large groups. Most importantly, don't get too close, because a hit from one of these really hurts.
Switches
As mentioned earlier, you will need to activate several switches to get through a level. There are three switches on each level: one will give you a weapon, one will open a few doors on the level, and one will open the checkpoint (or the doors to the control centre for the last level). Switches are generally located in a small alcove at the end of a long tunnel leading off from one of the chambers - because of this, you'll probably have to blast through quite a few enemies on your way in and out. However, there are often a few power-ups close to the switch so you can replenish yourself.
To activate a switch, you need to use either the Bzzt Blaster or the Virtublaster. Aim the crosshairs at the round plug in the middle of the switch like this:
Then fire continuously until the plug is destroyed (it takes 6 zaps from the Bzzt Blaster and about 1 second of fire with the Virtublaster). The switch will start to glow green, indicating that it is activated.
In the third level, TNT has used a clever trick to try and hide the last two switches - if you have trouble finding them, just go to where they are supposed to be and look around. They will be placed on a nearby wall some distance away, separated from you by a terrain feature of some sort (like lava).
Power-ups
The power-ups for the game can often be found in alcoves well away from the main chambers; usually, but not always alongside a switch. They may also be dropped by destroyed robots.
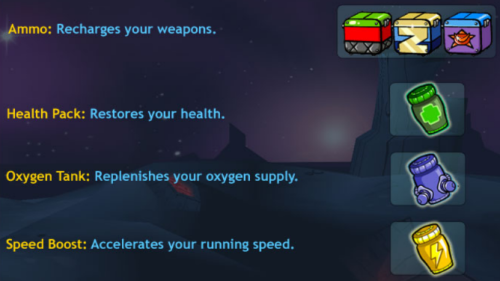
Pretty self-explanatory huh?
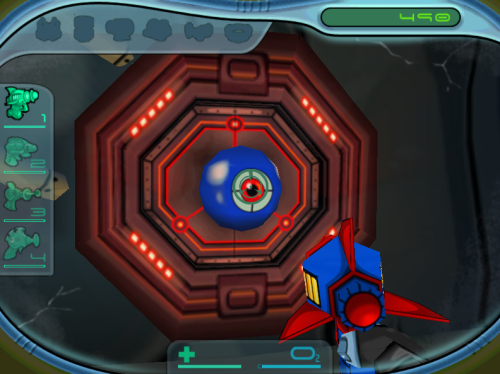
Destroying Sloth's Computer Core
So you've gotten past the first two levels, blasted your way through most of the third, and finally come to the control centre. You can see the giant device hovering in the centre of the room, but you can't figure out what to do next. It would be a real pity to have come all this way, only to be destroyed by a swarm of robots at the last hurdle. Well, don't worry, here's a quick explanation of how you can finish this once and for all (or at least until you decide to play again).
Hovering in the middle of the control centre is your final target: the computer core controlling all the robots in the mines. Floating in the air around the computer are three small spheres. These spheres act as shield relays, protecting the computer core from your weapons. You'll need to destroy those first. They're pretty tough and will take several seconds to destroy, so make sure you have some breathing space before you start.
Once you're done with the three shield relays, simply shoot the computer core until all the robots shut down.
Tips and Strategies
You won't need them to play the game, but the tips and tricks below will help to boost your score.
Kill, kill, kill!: The game's scoring system has a 10-minute timer. Basically, every minute you play the number of points you get from killing enemies gets lower. At the end of 10 minutes, only the last two enemies will give you any points at all, and only one point each at that. Because of this, most experts will try to get to the third level as fast as possible, then run around killing things until they are satisfied with their score. If you don't feel up to hanging around the third level for too long, then you can just continuously kill robots in a part of the game that you are comfortable with (as fast as possible of course) until you have a satisfactory score.
Listen up: The game's music actually changes when there are one or more robots heading towards you, and changes back once you destroy them all. Also, there is a distinct sound played every time an enemy teleports in. If you pay attention to these, you will always know whether or not to expect an attack, and you will have a rough idea of how many robots are on your tail.
Check all the angles: A common technique used in first-person shooters is to rotate the camera, checking behind yourself and to either side, while at the same time moving sideways/backwards so that you keep going in roughly the same direction without stopping. With a bit of practice, you can get an advance warning of anything sneaking up to you while barely slowing down. Doing this continuously may seem a bit silly, but getting jumped from behind isn't exactly beneficial to your score. It's not good for your nerves either.
Set the quality to 'low': You can find this option on the game's main menu. I know the special effects are pretty, but if you're playing for the points, you'll want to squeeze every last bit of performance out of your computer.
Conclusion
The Last Blast is a pretty complicated game as far as Neopets is concerned, but it's reasonably easy once you get the hang of it. Don't be creeped out by the music, the surroundings, or the sudden attacks from behind - remember that with your arsenal and a decent ammo supply, you have superior firepower, armour, range, and intelligence to anything Sloth can throw at you. For the duration of the game, the mines are your domain. Now go out and scrap anything that disagrees!
Alerts

 The Snowager
Next sleep in 1h, 42m, 28s.
 Next Possible Wake
Oct 14: 2 OR 3 AM/PM NST
Oct 15: 7 OR 8 AM/PM NST
Oct 16: 12 OR 1 AM/PM NST
Oct 17: 5 OR 6 AM/PM NST
 Obelisk War: Battle
Next cycle: 0d, 19h, 42m
Neopia Today
The Runway Contest

Recently At Forums
- Happy Bori Day!
- Tuesday, October 14
- Vote for the obelisk War! Round 322
- Monday, October 13
- Sunday, October 12